Perfect eyebrows almost transcend the beauty of the face and make an immediate visible impact in a makeover session. The most coveted eyebrow shape is the one that starts directly above the inner corner of the eye, while its highest point is little beyond the outer corner of the iris. It tapers off to the end in a rounded bow like shape. However, not many women have been endowed with that perfect brow so most of them have to resort to many other procedures to attain the desired shape or reach nearest to it such as plucking, tweezing and waxing the brows. Here are some simple tips to tame your brows:
- Spray a little hair spray on your brows and brush them using your toothbrush to keep them in place.
- If you don't have time for tweezing, you can get the desired contour quickly by brushing them upwards and then snipping the longest hairs beyond the natural arch using a pair of tiny scissors.
- Eyebrows slanting upwards make you look angry, so be careful not to take off too much at the outer corners.
- Before tweezing your brows, you must prepare your skin by wiping the brow area with a cotton ball soaked in astringent. The cooling effect numbs the skin for sometime and thus, you do not feel much pain.
- Hold the tweezers at 45 degrees and pluck the stray hairs below the brow line in the direction of the hair growth.
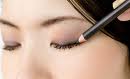
- If your brows are sparse, use a freshly sharpened brow pencil to fill in the areas with light, quick strokes.
- To get a natural and more defined look, you can brush your brows with a brow brush dipped in brow powder in upward and outward strokes.
- It is important to use the correct shade for your brows. Fair women can use blonde shades while olive colored women should choose tawny or brown. Dark African-American women can use gray shades.
- To add volume to your brows, use a stiff, slanted brush to apply eye shadow in short gentle strokes.
- In case, you have over tweezed certain brow area, try to fill the patch using brow shadow, applying in the direction of the hair growth.
- Eye shadow gives more natural look to your brows than an eyebrow pencil!
- Brow shade should be about two shades lighter than hair color for olive or dark skinned women and two shades darker than hair color blondes or women with grey hair.
Eyebrow Waxing
One of the easiest ways to get rid of the extra hair around your brow line, waxing is definitely note for those with very sensitive skin. It is more expensive than plucking your eyebrows but lasts longer too. It should best be done under professional supervision. Here are some tips to do eyebrow waxing:
- Before waxing the brows, it is important to prepare them beforehand using a baby toothbrush to define their natural shape.
- Apply astringent on the brow area to make it numb for sometime.
- Calculate the length of the eyebrow you want by holding a ruler parallel to your nose, leveling it with the inner corner of the eye to see where you the brow should begin and mark the point with a dot using the brow pencil.
- For people with close-set eyes, gap between the brows should be left wider while those whose eyes are far apart; the gap should be less for a balancing illusion.
- To calculate the curve and mark the highest point of the brow arch, hold the ruler from the edge of the nostril past the outer edge of the iris up to the eyebrow and mark it with a dot too.
- Link the dots in a gentle smooth arch that slightly tapers at the outer ends.
- You will need a professional waxing kit that comes with a jar of hot wax which, a small spatula and muslin removal strips.
- Warm the wax to an optimum temperature by keeping the jar in boiling water and then use the spatula to apply a thin layer of wax on the stray hairs under the eyebrow in the direction of the hair and remove it using the strips in the opposite direction of the hair growth as directed on the kit before the wax dries.
- Never wax above the eyebrows.
- For thick growth, it is better and less painful to wax off a little hair at the time.
- Pluck any stray hair using a set of good tweezers and apply a soothing balm on the area.
- Be careful enough to avoid direct sun light, acid based facial treatments, and liquid makeup for some hours at least.
- Emphasize your brows using an eyebrow pencil or tinted brow shadow.
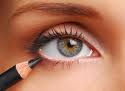
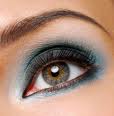
Applying Eyeliner
Eyeliner is used to give shape to the eyes and define them as desired. An important part of eye makeup, it is often used after eyeshadow and before mascara. Eyeliner can be used to add the dramatic touch to your face or soften the look of your eyes and must be used, keeping the color of eyes and the eyeshadow that you use in mind. Brown, navy and charcoal liners look gorgeous on light colored eyes while brown and plum shades are often used to enhance the beauty of dark brown and black eyes. Precise and dramatic strokes can be achieved by using liquid eyeliner while pencil eyeliner is the best to give soft touch to the eyes. To experiment with colors, you can moisten a small flat brush to use dark eyeshadow as eyeliner or a cake liner and the brush must be held as a pen. Pencil eyeliners need to be sharpened before using them.
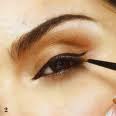
While applying the eyeliner, tilt your head back slightly and keep your eyes half-open to let you see yourself in the mirror as you are applying the liner. The line must be drawn on the upper lid from the inner side of the eye to the outer side. Let the liner dry before opening your eyes fully. To soften the look of harsh eyeliner, smudge it a little using the brush. Lower lid is lined from outer edge tapering to the inner side of the eye. Liquid liner has to be applied in one smooth stroke while pencil is applied by stroking the area lightly. Too thick eyeliner does not look good so go for thinner lines. Liquid liners need practice and brushed must always be washed with a makeup remover after using them. If your hand is shaky, stand close to the mirror to provide it support from the mirror.
While using a powder shadow as a liner, it is wise to hold a tissue directly beneath your eye to avoid it from getting all over the dace. The best tool to apply eyeliner is the sponge applicator. Liner applied as a series of dashes or dots or short feather-like strokes on the lash line are much easier to control than a solid line. If your lids are oily, you need to prepare it first just like you did for eyeshadow to avoid eyeliner from moving up to the crease area. Kohl pencils are ideally suited for the inner rims of the upper and lower lids and not the eyeliner as it soon smears easily and is also not good for eyes.
Classic traditional eyeliner look can be achieved by determining the thickness and intensity of the eyeliner according to the eyelid area. Larger eyelid area can use thicker and softer eyeliner while smaller eyelid area needs thinner and more intense liner. Since eyeliner is meant to create depth to the eyes and give thickness to the lashes, traditionally you can stick with dark brown, gray or black eyeshadow for the upper lid and softer tan, taupe, chestnut, brown, gray or black shades for the lower lid.
Applying Eyeshadow
Eye shadow is perhaps the most beloved cosmetic of creative makeup artists. Since eyes is the most important focal point of the face, the eye makeup techniques and choice of colors for eyeshadow should suit the shape and color of your eyes. The most important trick to keep in mind is that the light colors highlight the spots while dark colors tame them down. The first step in applying the eyeshadow is to apply a neutral concealer that matches your skin tone on the eyelid and then sweep the lightest shade over the entire area from the lash line to the brow line to create the smudge resistant base. Apply the medium shade on the lower lid and blend it into your base shade. A third color can also be added along the lash line and outer corner of the eyes as an accent to create the depth in eyes. The other tips that you can use are:
- Blondes with blue eyes should opt for browns and taupes while those with green eyes can go for soft mauves and lilacs.
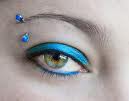
- Blue eyeshadow should only be worn only if you either have fair skin, black or platinum hair and brown or gray eyes or very dark skin.
- Don't match your shadow with your eyes or your clothes so that attention remains with your eyes and not your makeup!
- Emphasizing the inner corner of the eyes to make them look closer to each other. This can be done by applying a neutral base color over the whole eye and then dust a medium color on the inner half of the eyelid and blend it outward. You can then use eyeliner to line the lid from the inner corner of the eye to the middle and blend it outward.
- For day makeup, base color and mascara are the only things you need to wear for eyes.
- High quality powder eyeshadows can be used wet for heavier application by dampening your applicator a little.
- Lighter shadows help the bigger while darker shades make them look smaller. For bigger eyes, sweep a light shade over lid and darker shade on the outer corner of the lid and the crease. Outline the eyes using the eyeliner on the outer side of upper and lower lids while tapering a bit on the outside the eye to elongate it. Dab a white or cream shadow in the middle of the brow bone as a last step.
- Neutral shades like browns and beiges look natural while brighter shades like blue and green look dramatic and artificial.
- On mature skin and puffy eyelids, avoid using iridescent, frosted, light colors and white eyeshadows and opt for soft matte colors instead.
- Only use cream eyeshadows that do not cause creasing upon application and should be coordinated with powder shadows that are to be used on top of them. They should be applied using fingertips.
- Sweep a light or medium-tone shade on the lid and slightly darker shade above the eye crease to downplay the brow bone. Eyeliner should be thick in the middle of the eye and tapering at both ends. Add light highlighter to brow bone.
- To add definition to your eyelids, apply a medium-toned shade across the lid and brow bone and dust the under brow area with a light highlighter shade. Use a very fine pencil liner of natural color to line the upper and lower lash lines.
- To glamorize eyes for night outs, add shimmer to highlight your eyes.
- To lift up tired eyes extend the color from the outer corner of the lid upwards to give them a feline shape. A light highlighter on the brow bone without the eyeliner brightens up the eyes. Concentrate mascara on the inner corner of the eye.
- To make them look wider apart, keep the inside corners of the eyes lighter than the outer edges. Apply concealer one shade lighter than your skin at the inner corner of the lids and the sides of your nose and blend it well. Use a matte medium to dark eyeshadow and stroke it outward and slightly upward from middle of the lid to its outer half. Use the eyeliner a bit in from the inner corner of the eye and make the line tapering up and out a bit past the outer corner of the eyes.
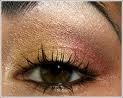
Applying Mascara
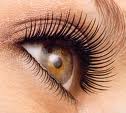
Mascara gives a finishing touch to your eye makeup and must cover the lashes from roots to the tips. Deposit the color on the mascara wand by twirling it in the pack and then cover the upper lashes from their base to the tips in full strokes to make the lashes look thicker, longer, well defined and separated. Mascara is applied from the underside by holding the wand horizontally parallel to the eyelid and the brush is rolled slowly in the upward stroke. For lower lashes, one has to be more careful so as not to smudge the under eye area and the wand is to be held vertically and mascara is applied from side to side. Less mascara is used on the lower lashes and extra color should be blotted off using the tissue paper. Usually women opt for more than one coat of the mascara, which combs the lashes too so that they do not look stuck together.
If mascara is deposited on the wand more than needed, tissue the extra color off before applying it. Different colors of mascara such as brown, navy and green can make you look funky instantly. It is important that mascara is used on an individual only to avoid transferring eye infections and if it causes even the slightest irritation in the eye, it must be immediately discarded. Wiggle the brush a little at the roots of the lashes as it allows the bristles to move between the eyelashes, combing them and separating them. Let mascara dry between any of the two coats and comb the eyelashes to separate the wet lashes. Do not rub eyes to remove the mascara but use the eye makeup solvent instead. Before applying mascara, use an eyelash comb or damp toothbrush to comb your lashes. Always use a clean and fresh mascara wand on damp lashes.
Black mascara can be used by anybody at anytime though blondes should only use it for bright night makeup. Thin and short brush is best as it is easier to control and gets to the corner of the eye easily. It is also advisable to powder the under-eye area before applying mascara to avoid smudging. Curl the lashes before applying mascara by moving the wand in a zigzag fashion to make the lashes look wider and brighter. Applying mascara only on the upper lashes lend them a dramatic touch, while applying it lightly on the upper and lower lashes, make the eyes seem wider. A gel-based mascara enhances the lashes while thickening mascara looks more dramatic and adds volume to your lashes. Brown, navy and aubergine shades add subtle and sophisticated touch to your eyes while redheads can use burgundy shades. Women with strawberry-blonde hair may try different shades of brown. Be sure not to match your mascara color with your eye color.
Cause Of Dark Circles

Our face attracts the most amount of attention. Therefore, we pay most attention to the way our face looks. We take special care of our face, its skin, its appearance and we try to present our face in the most beautiful manner we can. In a person's face, it is the eyes that catch the attention of the observer. If the eyes are beautiful the beauty of the face is enhanced. But a problem that a number of women face is dark circles under the eyes. When a woman has dark circles under her eyes, no matter how beautiful her eyes are their impact is diminished because of these dark circles. If we understand the cause of dark circles then we may be able to deal with them and treat them if possible. There are a number reasons for dark circles under the eyes. Given below are some of the common causes for the unsightly dark circles.
- Heredity: Dark circles under the eyes can be an inherited trait. If you have dark circles, then it is likely that other members of your family have dark circles too. The skin under the eye is very thin. When blood flows through veins close to surface of the skin it can produce a bluish tint. If your skin is transparent then the darker the circles will be. Transparent skin is also a inherited trait.
- Exposure to Sun: Exposure to sun especially during the summer months can make the skin under the eyes look darker. This is true for dark skinned people as well. Suntans are caused by an increase in the natural pigmentation of the skin, as a result of exposure to the sun. This increase in pigmentation is drawn to the surface. This applies to the skin under the eyes as well.
- Allergies and Eczema: Any infection of the eye that leads to itching can contribute to dark circles as rubbing and scratching the eyes darkens the skin. People who suffer from hay fever will notice that dark circles appear when the allergy is at its height. Certain food allergies can cause dark circles too.
- Medication: Any medication that dilates your blood vessels can cause dark circles under the eyes. As the skin under the eye is delicate an increase in blood shows through the skin in the form of dark circles.
- Nutrition: An improper diet, an unbalanced diet or lack of a nutritious diet can cause dark circles under the eye.
- Tiredness and Lack of Sleep: A lack of sleep or excessive tiredness can cause the skin under the eyes to become pale, thus, making the blood flowing under it visible.
- Pregnancy and Menstruation: During pregnancy and menstruation the skin becomes pale and the veins under the skin become visible.
- Age: As you grow older there are greater chances that you will have dark circles and they may become more prominent and permanent. If there are too many folds in the skin under the eyes, it will make the dark circles more prominent.
 RSS Feed